3D printing unlocks endless creative possibilities, but mastering the craft goes beyond just the outer shell. The often overlooked infill – the internal structure – plays a crucial role in strength, weight, and efficiency. From simple grids to intricate geometries, different infill patterns offer unique advantages and trade-offs. Explore the diverse world of infill designs and discover how to optimize your prints for the perfect balance of durability, material use, and performance.
Understanding Infill Basics
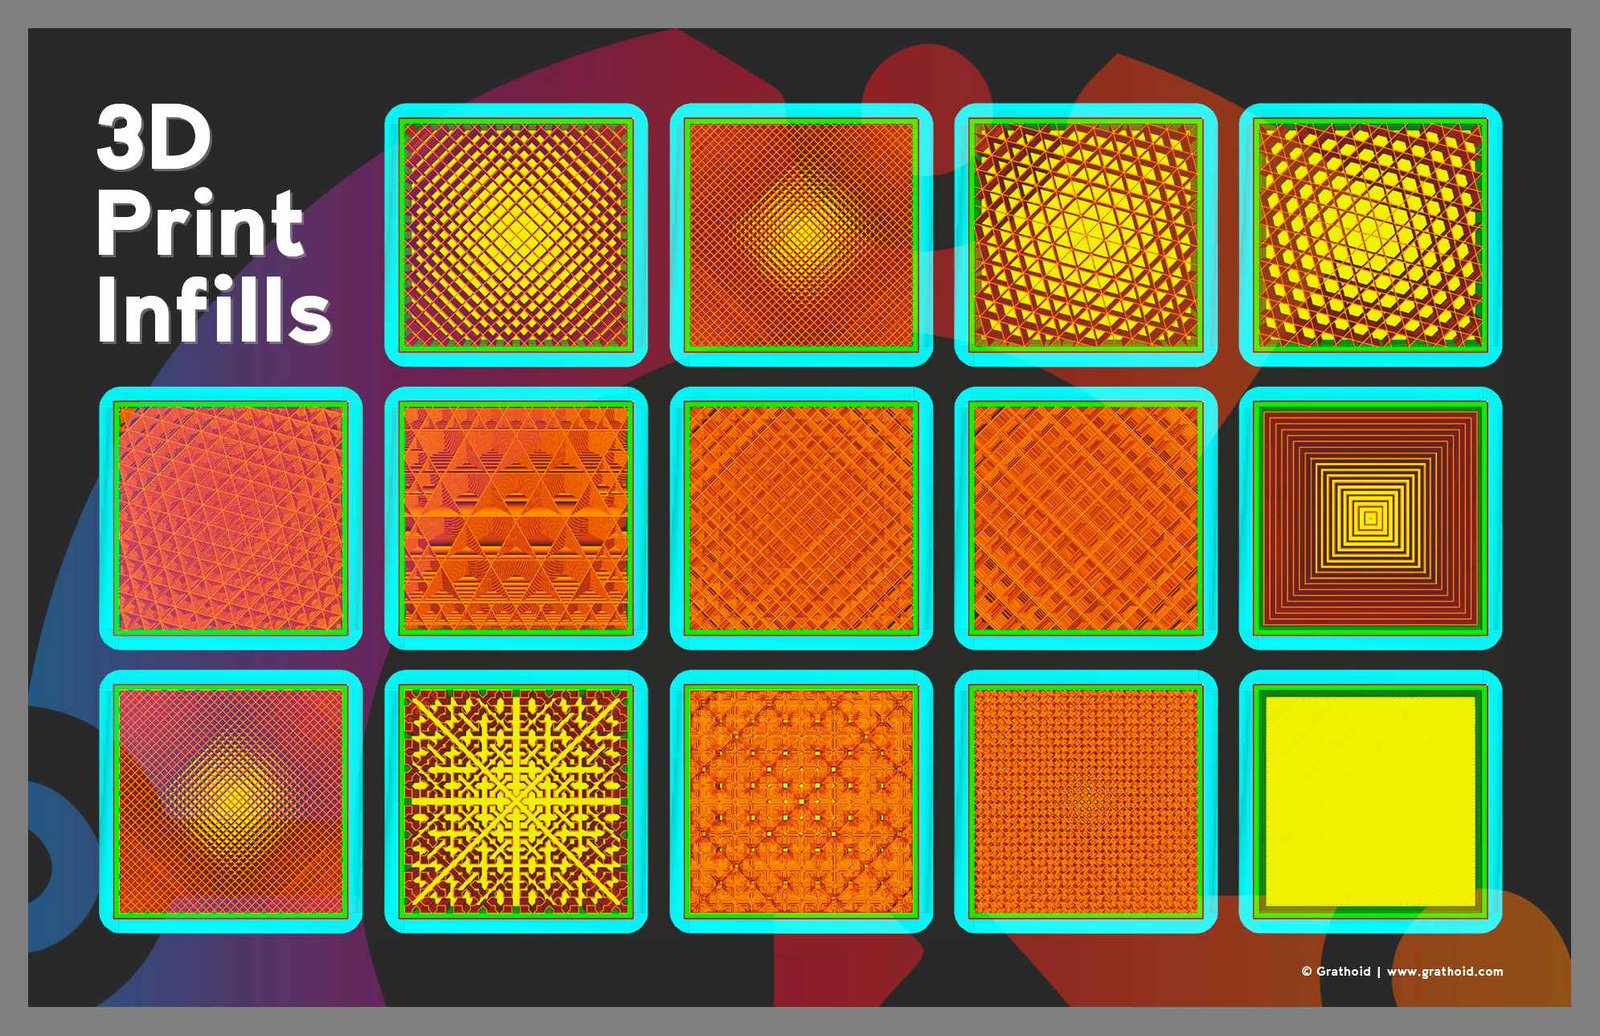
Infill density can range from 0% (hollow) to 100% (solid), with typical settings around 15-20% for most applications. Here are some key infill patterns:
- Grid: Quick to print, this criss-cross pattern provides basic support but isn’t ideal for high-stress parts. It’s often used for parts where speed is prioritized over strength.
- Lines: The simplest of all, consisting of parallel lines. It’s fast but offers minimal structural integrity, best for decorative pieces or when print time is a critical factor.
- Triangles: Offering strength in multiple directions, it’s excellent for parts that might experience force from various angles. This pattern is particularly useful for objects that need to withstand twisting or bending forces.
- Tri-Hexagon: A blend of triangular and hexagonal patterns, it balances speed with strength, distributing stress effectively. It’s a good choice for parts that need both strength and a moderate print speed.
- Cubic: Layers of cubes provide high strength but require more material and time, perfect for robust applications where durability is key.
- Cubic Subdivision: A variation where each cube is further divided, offering a compromise between speed and strength. This can be beneficial for parts needing more complex internal support.
- Octet: Inspired by the octet truss, it delivers impressive structural integrity with less material than cubic infill, making it efficient for heavy-duty parts.
- Quarter Cubic: Uses less material than cubic, reducing weight while still offering some structural support. Useful for parts where a balance between lightness and strength is desired.
- Concentric: Radiating from the center, this pattern adds strength where force is expected in a known direction, making it suitable for parts with predictable stress points.
- Zig Zag: Fast to print, this pattern gives directional support, suitable when force is applied along one axis. It’s often used for items where print speed is a primary concern.
- Cross: A basic pattern where lines intersect at right angles, providing moderate support for simpler parts.
- Cross 3D: An advanced version of Cross, adding depth to enhance support in all directions, offering better overall stability than its 2D counterpart.
- Gyroid: Known for its complex, maze-like structure, it provides excellent strength with less material, great for parts needing uniform support. Its aesthetic appeal also makes it popular for visible infills.
- Lightning: Designed for efficiency, it places material only where needed, reducing print time and material for large or less dense prints, ideal for prototyping or when material costs need to be minimized.
Choosing the Right Infill
- Strength vs. Weight: For lightweight yet strong prints, consider Gyroid or Tri-Hexagon. For maximum strength, Cubic or Octet might be better, though at the cost of more material.
- Print Speed: If time is a factor, simpler patterns like Lines or Zig Zag can speed up the process, albeit with less strength.
- Directional Forces: Concentric or Cross patterns can be used when you know the primary direction of applied force.
- Aesthetics: Some patterns, like Gyroid, can be visually appealing, ideal when the infill will be visible or part of the design.
- Material Efficiency: Lightning infill is perfect for saving material without sacrificing too much strength.
- Software Adjustments: Most slicing software allows for customization of infill density and pattern; experimenting here can lead to optimal results for your specific needs.
In conclusion, the choice of infill should align with the specific needs of your project. Whether it’s for functionality, aesthetics, or both, understanding and experimenting with different infill patterns can significantly enhance the quality and efficiency of your 3D prints. Remember, the best infill choice varies not just with the part’s intended use but also with the material you’re printing with and the capabilities of your printer.